Puppet: Dashboard
Earlier in this series I had mentioned the Puppet Dashboard and how we were going to discuss that at a later time. Well guess what kids, its that time.
Server Installation
For those needing a little background on the puppet server in this example, we’re running on a CentOS 6.3 box with both the EPEL and Puppet repositories configured and active. All puppet modules of coarse are coming from the puppet repo itself for the latest and greatest bits.
So run your command now:
Done! easy right? Well, not so fast. One of the things you may have missed is that you need a MySQL (or some other) database to get puppet-dashboard to work.
For this article, we’re going to use MySQL. In my environment, I have a mysql server running on the same host as my puppet server. So its simply a matter of setting up the puppet database.
create database puppet-dashboard
grant all on puppet-dashboard.* to puppetdash@localhost identified by 'passwordHERE'
Next, we have to make some configuration changes to the database.yml file that let’s Puppet know where to find our newly minted database.
vim database.yml
# Update the production portion of the file to reflect your database settings:
production:
database: puppet-dashboard
username: puppetdash
password: passwordHERE
encoding: utf8
adapter: mysql
If your MySQL database is on another host, you can simply add another parameter to the production settings of host: MySQL Server name / IP
Now for the fun stuff, time to create the tables and light this bad boy up! Since we already have a database created, we shouldn’t need to run the db:create portion of this, simply the migrate command should do the trick.
You should see something along these lines…
== BasicSchema: migrating ====================================================
-- create_table(:assignments, {:force=>true})
-> 0.0080s
-- create_table(:nodes, {:force=>true})
-> 0.0078s
-- create_table(:services, {:force=>true})
-> 0.0084s
== BasicSchema: migrated (0.0245s) ===========================================
== RemoveUrlFromNodes: migrating =============================================
-- remove_column(:nodes, :url)
-> 0.0161s
== RemoveUrlFromNodes: migrated (0.0162s) ====================================
Sweet, DB is setup! Now for a quick entry into our /etc/puppet/puppet.conf on our master server and we’re good to go.
reports = store,http
reporturl = http://yourserverhere:3000/reports/upload
# restart puppetmaster
service puppetmaster restart
Now the only thing left to do is start the puppet-dashboard service.
Starting Puppet Dashboard: => Booting WEBrick
=> Rails 2.3.14 application starting on http://0.0.0.0:3000
[ OK ]
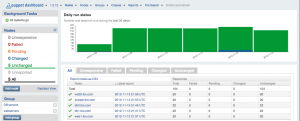
Take your favorite web browser and point it to the URL of your puppet server on port 3000 and you should see something that looks like this:
Note: This puppet dashboard shows a bunch of data already being populated, your server will most likely not have any sort of graphs populated out of the gate.
From here you can add nodes and groups so as they report, you can do various cool things with them. This is merely an installation guide, not a full product demo of what the dashboard can do.
Client Configuration
You’re using puppet to update your puppet.conf files right? If not, you soon will be. In order to have all your nodes properly report back, not only do you have to add them as a node in the dashboard UI, you also need to add the following to the [agent] section of your puppet.conf file.
report = true
Restart your puppet agent process and your node should start reporting the bits back.
Gotchas
Pending Jobs
If you happen to see something in your puppet-dashboard UI that looks like this…
The solution is pretty simple to solve. basically, your workers are not running. Simply start them with the following command:
Starting puppet-dashboard-workers: [ OK ]
Time Zone
If your time is defaulting to UTC, the fix is also pretty simple. All you have to do is update the settings.yml file.
# Get the local timezone of your server
# rake time:zones:local
(in /usr/share/puppet-dashboard)
DEPRECATION WARNING: Rake tasks in vendor/plugins/delayed_job/tasks are deprecated. Use lib/tasks instead. (called from /usr/share/puppet-dashboard/vendor/rails/railties/lib/tasks/rails.rb:10)
* UTC -06:00 *
Central America
Central Time (US & Canada)
Guadalajara
Mexico City
Monterrey
Saskatchewan
# vim settings.yml
# you'll see a commented out section for time_zone
time_zone: 'Central Time (US & Canada)'
# Save and restart puppet-dashboard
service puppet-dashboard restart
More Information
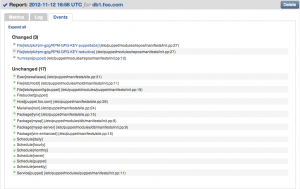
There is a lot of powerful information that you can get from your dashboard so I highly encourage you to poke around. Here are just a few screenshots showing how you can drill down into the latest changes.
If you are looking for more information and probably a lot better documention on how to get this done, I recommend you check out PuppetLabs official docuemation at:
http://docs.puppetlabs.com/dashboard/manual/1.2/bootstrapping.html


